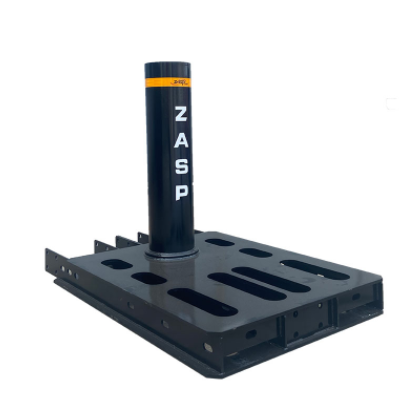
How do I install shallow mounted fixed bollards?
Shallow mounted fixed bollards are an effective and reliable solution for traffic control, security, and perimeter protection. These bollards are specifically designed to be installed with minimal excavation, making them an ideal choice for areas where deep foundations are not possible or desirable. In this article, we will provide a comprehensive step-by-step guide on how to install shallow mounted fixed bollards, ensuring a sturdy and secure installation.
Step 1: Determine the Installation Location
The first step in installing shallow mounted fixed bollards is to carefully select the installation location. Consider the purpose of the bollards, such as traffic control or security, and identify the areas where they will be most effective. It is crucial to choose a location that does not interfere with existing infrastructure, utilities, or underground services.
Step 2: Mark the Position
Once you have selected the installation location, use a measuring tape, and mark the position where each bollard will be installed. Ensure that the spacing between the bollards is appropriate for the intended purpose and allows for smooth traffic flow or effective security measures.
Step 3: Prepare the Mounting Surface
Prepare the mounting surface by removing any debris, dirt, or obstructions. Ensure that the surface is clean and level, as this will ensure a secure and stable installation. If necessary, use a shovel or other tools to level the ground and remove any unevenness.
Step 4: Dig the Foundation Holes
Using a post hole digger or an auger, dig holes for the bollard foundations. The depth and diameter of the holes will depend on the specific requirements of the bollards and the manufacturer's instructions. Typically, shallow mounted fixed bollards require holes that are shallower and wider compared to traditional bollards. Follow the manufacturer's guidelines for the recommended hole dimensions.
Step 5: Insert the Bollard Foundations
Place the bollard foundations into the prepared holes. Ensure that the foundations are level and plumb by using a level and adjusting the position as necessary. It is essential to align the bollard foundations accurately to ensure a straight and uniform installation.
Step 6: Secure the Bollard Foundations
Once the bollard foundations are properly aligned, fill the holes with a quick-setting concrete mix. Ensure that the concrete is properly compacted around the foundations to provide maximum stability. Follow the manufacturer's instructions for mixing and pouring the concrete, including the curing time required.
Step 7: Allow the Concrete to Cure
After securing the bollard foundations with concrete, allow the concrete to cure fully. The curing time may vary depending on the specific type of concrete used, the ambient temperature, and other factors. It is essential to follow the manufacturer's guidelines and allow sufficient time for the concrete to harden and gain strength.
Step 8: Install the Bollard Sleeves
Once the concrete has cured, install the bollard sleeves over the bollard foundations. These sleeves provide the outer shell and aesthetic appearance of the bollards. Ensure that the sleeves fit securely and are properly aligned with the foundations. Some bollard sleeves may require additional fasteners or attachment methods, so refer to the manufacturer's instructions for the specific installation requirements.
Step 9: Secure the Bollard Sleeves
To ensure a sturdy and secure installation, fasten the bollard sleeves to the foundations according to the manufacturer's instructions. This may involve using screws, bolts, or other types of fasteners. Check the alignment and stability of each bollard after securing the sleeves to ensure a consistent and uniform installation.
Step 10: Test and Inspect
After installing the shallow mounted fixed bollards, perform a thorough inspection to ensure that they are securely in place and functioning correctly. Test each bollard by applying pressure or force to confirm their stability and resistance. Make any necessary adjustments or repairs to ensure that the bollards are fully functional and meet the required standards.
Conclusion:
Installing shallow mounted fixed bollards can be a straightforward process if the proper steps are followed. By carefully selecting the installation location, preparing the mounting surface, and correctly securing the bollard foundations and sleeves, you can achieve a durable and effective installation. Remember to consult the manufacturer's guidelines and adhere to any specific instructions provided. With the proper installation, shallow mounted fixed bollards will serve as a reliable solution for traffic control, security, and perimeter protection.


